Wednesday, 22 February 2012

Copper plates for the ship's bottom

After a research , I found in  https://sites.google.com/site/shipwrightsfaq/smf-researchnotes/smf-RN-VictoryCopper  the size of the copper plates.
I converted the dimensions on the 1/32 scale , and gave me  length 38,1mm and width 14,29mm. By rough calculations , I will need about 600 pieces for the one side of  the model.
Two months ago , I bought copper and I placed it outside in rain and sun for two months , to take aging color.

I cut the desirable dimensions ( 38,1mm x 14,29 mm) , using office paper cutter...


...and using rivet maker , I made the rivets on the perimeter of each one .


Finally , using a cotton bud , I washed them with sea water to get the green color of verdigris.


This process was tiring , monotonous and it took two weeks. On the other hand , the result satisfied me.

Saturday, 4 February 2012

Guns and carriages construction

 From the "Anatomy of HMS Victory " , I took the plans of carriages and I fitted them in 1/32 scale.There are four different types of carriages on the specific segment of the ship.
So I had to build four different types of them  and four different types of guns.
More analytically , I need six 12-pounder short guns for the quarterdeck , eight 12-pounder long guns for the upper deck , eight 24-pounder long guns for the middle deck and  eight 32-pounder long guns for the lower deck!


I made copies of plans and  I cut them on jigsaw (sixty sides for a start).Using files and dremel tool I cleaned  the perimeter of them and I opened the necessary holes.


 I considered that , for better results , I sould make a mold for each type of carriage . This was  a tiring process, but I took the best results of them.


 When  I finished everything , I painted with yellow ochre, and I let them dry. In meantime , I made the fittings.


This is my first effort with guns.I don't know yet , who I will make the rest of them .


Saturday, 28 January 2012

Painting the main mast

When the ochre had dried , I glued with white glue the sub parts of the construction . After masking the appropriate areas , I painted  them black . I used oil colour of Winsor & Newton  No 24 . After research on the shade of ochre , I decided to mix the Winsor's numbers 44 and 8 , until to get the right shade according to the available photos . 


Two days later , I wiped the colour with a clean brush , to illustrate the coated  wood .


A week later , was sprayed matt varnish. 


Wednesday, 25 January 2012

Continuation of Main mast


Based on Corel's plans and photos of the real , I made the cup of the main mast and various other items.


 Then , by a sheet of copper , constructed the bindings of the mast . These masts were made ​​by a group of five or six sections of wood . This results in stiffness of the whole.
Once  they taking the form , they tied  with metallic clamps.


Once I finished gluing , began the research and effort to find appropriate shade of ochre , which will not only painted the mast , but also other parts of the ship.


Friday, 20 January 2012

Making low main mast and top cross tree

Αt this point, the problem was the type of wood which I would use for the main mast . The reason is that, the mast sould not bent by passing time , because its length.


 So finally decided to use a piece of a common curtain rail. When it got the octagonal  shape , I made the cheeks of it and the bracket of  mast cap.

 The top crosstrees are made from ajuz .
 From the same material was created the tree. The individual parts  glued together with carpenter's glue.


Thursday, 19 January 2012

Making main's mast top

 First of all , I placed strips of  oak veneer thickness 0,6mm onto shaped according to plan plywood thickness 2mm. The perimetric timbers of mast top , sank in boiling water. After five minutes immediately , formed easily ,using thin nails and stayed for thirty minutes.When they took their shape , glued using carpenters glue...     


...on next step , I opened twelve holes , that will recieve on  the deadeyes and I marked the positions of  stiffeners...

...and I placed the cosstree on the bottom side of topmast.


On the end I glued using CA glue the stiffeners on the top side of mast top...


 ...and spaying the whole with black oil painting.


I decided to paint the entire model wih oil paintings , because they will better shows the surface of wood and  will last for longer time.

Start of construction works


The  HMS Victory, is one of the most famous ships of the global naval history.
It is the favorite theme of  the shipmodel builders, all over the world. I think this is the best seller of the wooden ship models.
Twenty years ago , I built the plastic model of Heller in 1/100. It was a pleasant experience , but was a plastic one ! So, now it's time to start the real thing.
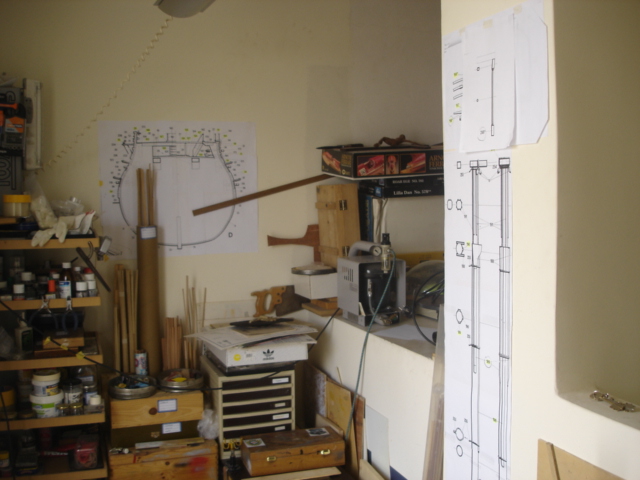
The very first thing , who I have to do, is to clean up my workplace, and create space...
Space for a part of the ship in scale 1/32 .


As refenence Ι will use the plans of the book "Anatomy of the ship". The planned dimensions  of model , are  lenght 500mm , width 500mm and height close to 2000mm (2 metres!!!)
The large scale , requires carefully salection of materials .The real ship is made mostly of oak wood.
In 1/32, with specific intersections of wood , it's not easy to work with oak. For scales sake , I decided  to work with ajuz. The color and the look of ajuz , for my opinion , are very similar to oak. Furthermore , it's very soft and light , thus facilitating the process. Certainly selected timber drying.

 
After carefully study and recording of the parts I would need , cut the necessary pieces for each part to be used in the model. 
To save space, it was decided to manufacture the first sub-parts and finally to build a section of the hull, where it will accept them  per deck.
So basically the construction starting from the main mast...